iPhone to Computer Transfer Review > Guides > iPhone to iTunes - How to Transfer iPhone to iTunes?
How to Transfer iPhone to iTunes?
 Your computer crashed and now that you got a new one you wanna transfer all music from your iPhone back to computer before sync it again. Your computer crashed and now that you got a new one you wanna transfer all music from your iPhone back to computer before sync it again.
You just got a new laptop and want to transfer all songs and playlists from my iPhone to my iTunes library.
By the way, you don’t want lose anything on your iPhone when sync your music back to iTunes. Make it easy, we call it iPhone Backup.
But You must keep in mind, in order to protect copyright music, iTunes block you from transfering music and song back to iTunes. All you can do is sync, surely there will lose something on your iPhone.
If you face the questions mentioned above, you may try iPhone to Computer Transfer. It is a useful iPhone to PC transfer software to fast transfer, backup, sync your iPhone contents: music, video, photos and playlists to iTunes.

Step-by-Step Guide: How can I Transfer iPhone to iTunes?
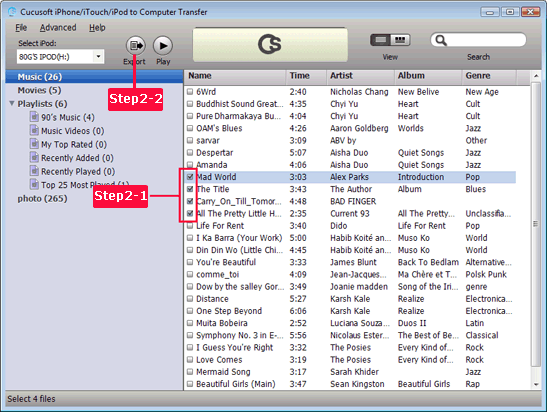
Step 1: After your iPhone/iPod/iTouch connected to pc, Launch the program you will see the right UI. Normally, the program will search the device automatically. If the device is enabled, the files (songs/movies/photos) will be shown in the list.

Step 2: Choose the list and files you want to transfer , Click the Export button.
Step 3: After you clicking the Export button, the following window will pop up, you can choose transferring to computer or iTunes directly.

OK, you have successfully transferred iPhone to iTunes!
Notes: If you click Export to Disk Only, the software will automatically transfer iPhone songs to computer. If you want to transfer Music from iPhone to PC, there is another guide for your reference.
Related Solutions:
|
